Saturday, December 31, 2016

Paper Sweeties Challenge - January 2017: Anything Goes!


Happy New Year 2017!!!!  And welcome to the Paper Sweeties January 2017 Challenge! 


Isn't this inspiration photo sweet!  I love the darling winter scene and those adorable COLORFUL snowman!  I was so inspired that I actually made two projects for today....

First a sweet snowman ornament....I took a picture of it in my hand so you can get a feeling for the size of the ornament:

I created this darling little snowman using the sweet cuts from the "Snow Friends" set.  I have outlined the steps and the order in which I did them in case anyone would like to try making one:

Step 1:   I diecut the snowman body twice from white felt and the snowman hat twice from black felt.

Step 2:  I used black and orange embroidery floss to hand sew the eyes, nose, and mouth onto one of the snowman body die cuts. 

Step 3:  I hand cut some brown felt to create arms for the snowman.  I used straight pins to pin the arms into the two sides of the snowman's body in preparation for sewing.

Step 4:   I then used a running stitch with a full strand of embroidery floss in the same white to sew around the snowman leaving an opening at the top to stuff it before sewing it closed.  I stuffed it with some filing I had on hand and then sewed it closed.

Step 5: I pinned the two black hat die cuts in place on top of the snowman's head.  Then I sewed around the hat attaching it to the snowman's head but leaving the top of the hat opened until I stuffed it too.  Then I sewed it closed.

Step 6:  I hand cut a small piece of red felt to create a hat band for the snowman's black hat.  I wrapped the two ends of the hat band to the back of the hat and trimmed so that they met in the middle.  Then I used red embroidery floss to sew the band into place.  You could use hot glue for this step if you wish.

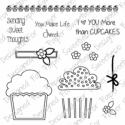
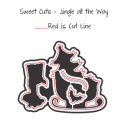
Step 7:  I added a torn piece of my favorite red gingham fabric for the scarf, sewed on a black piece of embroidery floss for the ornament hanger and two red buttons.  I die cut a holly embellishment from the "Jingle All They Way" sweet cuts and added three tiny red pearls to it.  I then used my hot glue to attach the holly embellishment to the hat and to get the scarf to lay flat.

Step 8:  I took the completed ornament outside and sprayed it with liquid adhesive and then sprinkled some glitter on it for some SPARKLE!

Just one last step....

Step 9:  To make the ornament look cute from both the front and back when it is hanging on the tree I added a sweet sentiment to the snowman's backside:

Step 9 cont'd:  I die cut a heart shaped tag from the "Beautiful Little Wishes" sweet cuts and stamped the "You Melt My Heart" sentiment from the "Thanks Snow Much" stamp set.  I then used some red crochet thread to tie a bow through the top and hot glued the tag to the back of the snowman!

I love the sweet detail that this heart shaped tag adds!  I could have actually put a face on both sides if I had thought of it....but it is cute either way!

My second project was inspired by the pretty array of colors in the Inspiration photo.  The colors reminded me of the Northern Lights...so I made this sweet shaker card:


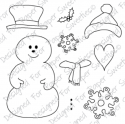
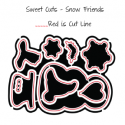
I used my distress inks to create the multi-colored background and then once again used the "Snow Friends" stamps and sweet cuts to create my sweet snowman.  The sentiment is embossed with white embossing powder and is the same one I used on my snowman ornament above from the "Thanks Snow Much" stamp set.  I added some Copic Marker to the heart to make the sentiment stand out more.  I also added some white gel pen dots and snowflakes to the background and glued some of the sequins and snowflakes from the Sequins Winter Mix in place before filling my shaker.


 Since Christmas is over I thought this card would work perfectly for Valentine's Day!

That is it for me today but as always there are many more wonderful blogs to visit on today's blog hop:

Debbie Marcinkiewicz – Paper Sweeties
Nancy Salkeld
January Guest Designer:  Dawn Barwick

A warm welcome to Dawn Barwick who is this month's Guest Designer!  We are so happy to have her joining us today!

Don't forget that you no longer need to have a blog to play along in our challenges.  You can now upload a photo on our Facebook page "Paper Sweeties Inspiration".  Just go to the Photos tab and click on Albums and find the January Inspiration Challenge:  HERE

We look forward to seeing what you are creating!  It is one of my favorite things to see - someone creating adorable cards or tags with the products that I help represent as a Creative Designer for Paper Sweeties!  I love all of the wonderful projects that have been uploaded on our Facebook "Paper Sweeties Inspiration" page this month!  A big shout out and thank you to Janis Morris, Rayann Culp and Tiffany McGill for sharing with us along with EVERYONE that participated in our December Inspiration Challenge!  We love sharing paper crafting with each and every one of you! 

The Design Team will be back for the January Countdown and Release starting on the 13th of this month with Planner inspiration and the 14th with New Stamps and Sweet Cuts inspiration!  Hope to see you then!
Crafty Hugs!
Jill


Saturday, December 24, 2016

25 Days of Christmas with Paper Sweeties - Merry Christmas Hop!

Merry Christmas Everyone!  

I hope you are all enjoying a lovely Christmas Day with family and friends!  Today is the last day of Paper Sweeties 25 Days of Christmas!  And today we are all sharing a favorite project from this past year.  I have to admit it was very hard to pick just ONE favorite project for the entire year!  There were so many that I really loved!  But since it is Christmas I decided to go with this sweet Baby Snowman Tag!


You can find out more about the products used to make this tag by reading this blog post:  HERE

Here is one more picture showing all three of the tags that I made:

 I now get to send you off to the rest of our wonderful team:


Debbie Marcinkiewicz – Paper Sweeties


Enjoy each moment of your Christmas Day!  God Bless Us Everyone!
Jill

Products linked below are from the original blog post in which I created these snowman tags: HERE


Wednesday, December 14, 2016

Winter Coffee Lovers Blog Hop + Paper Sweeties and Visions of Sugar Plums Challenge

Hello again....I am back tonight with another quick post for the Winter Coffee Lovers Blog Hop on behalf of Paper Sweeties!
I am also linking up to Lori Hairston's wonderful "Visions of Sugarplums Challenge 2016"!  

 I hope you will check out both of these wonderful challenges!!!!


Paper Sweeties is once again one of the many wonderful Super Sponsors for the Coffee Lovers Blog Hop:


Here is a little more info about my card:

(This card uses a lot of the same products as yesterday's card.  I needed this card to send to someone tomorrow morning so I used a bunch of left over die cuts on my desk and came up with it quickly this evening.)   I used the wonderful "Eat Cake" stamps and die to create my cup of cocoa!  The whip cream is the cupcake frosting in the "Sending Sweet Thoughts" sweet cuts set.  My background card panel is embossed with a snowflake embossing folder and then glittered with some Diamond Stickles.


The sentiment is from the "But First Coffee" stamp set!  And the heart on the mug is from the heart border die in the Sweet Borders Sweet Cuts.  I stacked 4 on top of each other to create some dimension.  A sweet sparkle pipe cleaner formed into a bow adds a finishing touch to this card! I hot glued it in place so it would not fall off!

Thanks for taking a look!
Hugs,
Jill


Tuesday, December 13, 2016

Winter Coffee Lovers Blog Hop + Paper Sweeties


Hi Friends!  Today is National Cocoa Day which is definitely something to celebrate!  And Paper Sweeties is once again a sponsor for the amazing Winter Coffee Lover's Blog Hop:

The event has been running since December 9th and this is my first post!  I am hoping to maybe squeeze in a few more before the 16th!!!!  If you play along you will be eligible for a chance at this prize from Paper Sweeties:


 A $25.00 gift card!  Yummy!  And this is just one of MANY prizes and MANY WONDERFUL SPONSORS!  See what I mean.... it is an AMAZING EVENT!  I hope you will play along too!  The more the merrier especially at this time of year! :)

To create my card I drew inspiration from this month's inspiration graphic for Paper Sweeties Challenge:

 If you make a card based on the inspiration photo or colors and link it up at the Paper Sweeties Blog or on our Facebook Paper Sweeties Inspiration page in the challenge album you can be eligible for this month's prize which is a $100.00 gift certificate!  Did I mention that Paper Sweeties carries the MISTI stamping tool?  I hope you will join in the fun!!!!!

Onto my card.....


My sweet "Christmas Cocoa" card uses lots of yummy stamps and sweet cuts dies from Paper Sweeties!  The sweet cup and saucer are from the "Eat Cake" stamp set.  The holly is from the new "Jingle All The Way" sweet cuts.  The whip cream is actually the cupcake frosting die from the "Sending Sweet Thoughts" Sweet Cuts.


I created the background with the heart border die from the Sweet Borders Sweet Cuts.  I cut it repeatedly down the front of a card base.  I then backed the openings with a sweet gingham patterned paper and inlaid the die cuts back into the card front with only some of the hearts in place.  I added "Stickles" diamond to some of the hearts for a little bit of holiday shine!

Thanks for taking a look at my card!  I cannot wait to hop around and see more of the wonderful projects being posted!  Gorgeous Inspiration!  Thanks to everyone that makes this event happen and to all of the incredible sponsors!  Happy Holidays to all!
Jill

Edited on 12-14-2016 to ADD:

I forgot to link up to Lori Hairston's wonderful Visions of Sugarplums Challenge 2016!  Oops!

I try to link up each year and join all of the fabulous inspiration!  Lori always has free downloads for Christmas crafting and there is a ton of wonderful inspiration from her team of designers!  Join in the fun!
And thanks to Lori and all of her sponsors for this wonderful event each year!!!!!  I love it!!!!


Friday, December 9, 2016

25 Days of Christmas with Paper Sweeties


 Welcome to Day 10 of the 25 Days of Christmas Blog Hop with Paper Sweeties!  I am so excited to share my projects with you today!


In case you have not been following along or have missed some of the wonderful posts you can find links to all of the posts and info on the sales Debbie has going at the  25 Days of Christmas Paper Sweeties Blog Post:   HERE.


I have three wonderful projects to share with you today:

The first is a set of hot cocoa tags:

 My son and I have a love of hot cocoa especially on really cold winter mornings!  I created 3 hot cocoa tags using a variety of Paper Sweeties products.  The tag base is the Paper Sweeties Window Sweet Cut.  I inked it in some Memento Toffee Crunch ink to make it look like a toasted marshmallow.  The sweet teacup is from the Eat Cake stamps and sweet cuts!  I love this set!!!!  I added a heart to the teacup from the Sweet Borders Sweet Cuts dies.  To make my whip cream or marshmallows on top of the teacup I used the "Sending Sweet Thoughts" sweet cuts.  And the candy cane is stamped and die cut using the Ho Ho Ho sets.  The sweet little gingerbread man is from the new Planner Series: Happy Holiday Stamp set!  Isn't it adorable!  You have to have cookies with your cocoa right?!  The sentiments are from the "But First Coffee" stamp set and the "Warm Winter Wishes" stamp set.  I love how these turned out.  

 On this tag I left the background clean and simple!  I love the fresh look it has!
 On this tag I used the leftover negative candy cane die cut paper as a stencil on the tag background!  I love how this turned out!  So.....
 I used the stencil again on this tag too but left it a little bit lighter. 

Next I made a sweet little reindeer ornament:
 I used the deer sweet cut from the Jingle All The Way sweet cuts.  I cut if 4 times from a tan colored wool felt and then sewed a blanket stitch around the edge of all 4 at once. This made a nice thick ornament.
I then created a jingle bell collar using some red wool felt and some teeny tiny rusty jingle bells from my stash.  A red bow finishes off the front of the collar.

 He looks so cute hanging on our Christmas Tree! 

My last project is another tag:

I decided I needed to make a cookie jar full of the sweet little gingerbread men from the Planner Series: Happy Holiday Stamp set!


I used Clear Card Stock and my tiny attacher stapler to create my jar filled with the gingerbread men!  The "cookies" sentiment is also from the same planner stamp set.  The heart tag is from the Beautiful Little Wishes sweet cuts.  And I paper pieced the topper on the jar using some red gingham paper from my stash.  Love how this turned out!  Some rusty jingle bells from the Paper Sweeties shop and a red sparkle pipe cleaner and velvet ribbon make a lovely hanger for my tag.


Well that is it for me today!  I am praying that this post goes through on Blogger as it is the second time I have had to completely re-do it!  Blogger is having problems today for some reason!  If you are seeing anything strange that may be why!  LoL! 

I hope you will also join in Paper Sweeties December Inspiration Challenge!  Debbie is offering a wonderful $100.00 gift certificate to this month's winner!


 And each day of this wonderful 25 Days of Christmas Hop she is also running specials and other fun things via the blog and Paper Sweeties website and on our Paper Sweeties Facebook Inspiration Page! 

 I wish you all a wonderful Holiday Season! 
Blessing and Hugs to you and your families!
Jill